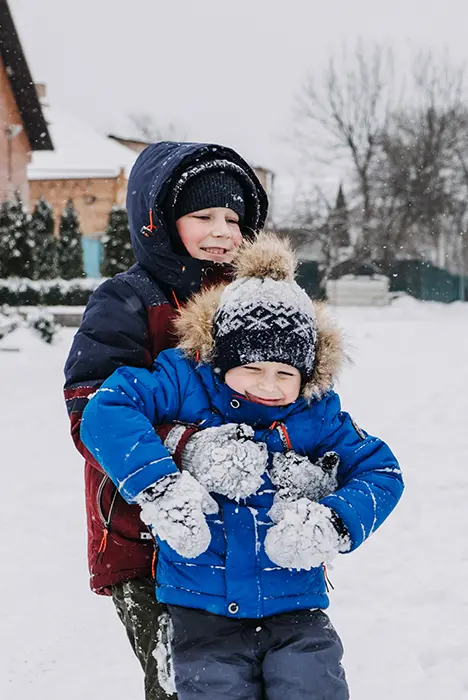
Winter is here, and what better way to enjoy the snow than with some good old-fashioned sledding? But what if you don’t live near a ski resort or natural snowfall is limited in your area? Fortunately, making snow at home is easier than you might think, and it can provide hours of winter fun for you and your family. In this guide, we’ll take you through everything you need to know to make snow for sledding in your own backyard.
Why Make Snow at Home?
Before we dive into the specifics of snowmaking, let’s first discuss why you might want to make snow at home in the first place. Here are some of the benefits:
- Convenience: With your own snowmaking equipment, you can make snow whenever you want, without having to rely on natural snowfall or the hours of operation at a ski resort.
- Cost-effective: While there is an initial investment for snowmaking equipment, it can save you money in the long run if you frequently enjoy winter activities like sledding, skiing, or snowboarding.
- Fun and creative: Making your own snow can be a fun and creative way to enjoy the winter season, especially if you have kids who love playing in the snow.
Now that we’ve covered the benefits of making snow at home, let’s get into the specifics of how to do it.
Equipment Needed for Home Snowmaking
Before you can make snow, you’ll need to gather some equipment. Here’s what you’ll need:
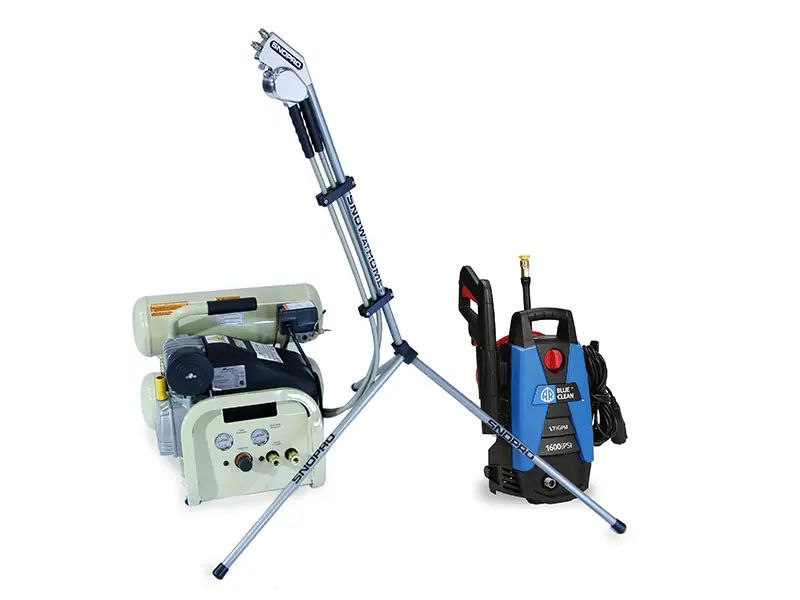
- Snowmaking nozzle: This is the piece of equipment that creates the snow. There are various types of nozzles available, but a common option is the “fan gun” style nozzle that uses compressed air to create snow.
- Compressor: The compressor is what provides the compressed air needed for the nozzle to create snow.
- Water source: You’ll need a source of water to mix with the compressed air to create snow. This could be a garden hose or a more permanent water source like a well or pond.
- Snowmaking pump: If you’re using a large amount of water, you may need a snowmaking pump to provide the necessary water pressure.
- Cold weather gear: Making snow can be a cold and wet process, so make sure you have warm, waterproof gear to stay comfortable while working.
Creating the Perfect Snow for Sledding
Now that you have your equipment, it’s time to start making snow! Here are the steps to follow:
- Check the weather: Ideally, you want to make snow when the temperature is below freezing. The colder the temperature, the more efficiently the snow will be made.
- Set up the equipment: Install the snowmaking nozzle onto a stand or tripod, and connect it to the compressor and water source.
- Turn on the compressor: Begin by turning on the compressor and adjusting the air pressure to the manufacturer’s specifications for the nozzle you’re using.
- Turn on the water: Slowly turn on the water to begin mixing with the compressed air. Adjust the water flow rate to achieve the desired consistency of snow.
- Check the snow quality: As the snow begins to accumulate, check its quality to ensure it’s suitable for sledding. The ideal snow consistency is light and fluffy, not wet and heavy.
- Adjust as needed: Adjust the air pressure, water flow rate, and nozzle angle as needed to improve the snow quality.
Safety Considerations for Snowmaking
While making snow at home can be a fun and rewarding experience, it’s important to take some safety considerations into account. Here are some tips to keep in mind:
- Wear appropriate gear: As mentioned earlier, make sure you have warm and waterproof gear to keep yourself protected from the cold and wet conditions.
- Keep a safe distance from the nozzle: The compressed air used in snowmaking can be dangerous if you’re too close to the nozzle. Stay a safe distance away to avoid any injuries.
- Follow manufacturer instructions: Make sure you’re following the manufacturer’s instructions for your snowmaking equipment to ensure safe and efficient operation.
- Consider the environment: Before making snow, consider the environmental impact. Make sure you’re not wasting water or causing any damage to your property or the surrounding area.
Alternative Methods for Making Snow
If you don’t want to invest in snowmaking equipment or don’t have the space for it, there are still some alternative methods you can try for making snow at home. Here are a few options:
- Use a snow cone machine: While not ideal for sledding, a snow cone machine can produce small amounts of snow that can be used for snowball fights or making snowmen.
- Freeze ice blocks: You can also freeze large blocks of ice and then use a snow shovel or ice chopper to create snow-like piles.
- Wait for natural snowfall: Of course, the simplest and most environmentally-friendly option is to wait for natural snowfall to occur. While it may not be as reliable or frequent, it’s still a great way to enjoy winter activities.
Conclusion
Making snow at home can be a fun and rewarding experience, and with the right equipment and technique, you can create snow that’s perfect for sledding or other winter activities. By following the steps outlined in this guide and taking safety considerations into account, you can enjoy the winter season in your own backyard.


